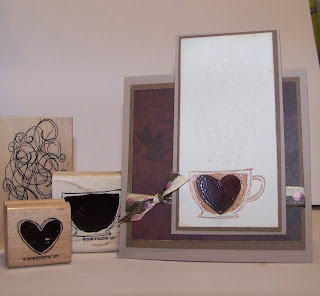
So on to Embossing.
 To get started, you are going to need the basics for a card,
plus, an Embossing Ink pad (I use Versamark and you can use any PIGMENT ink pad)
Embossing Powder and a Heat tool.
 I also use an Embossing Buddy before I stamp on my CS. This helps clear the CS of static and moisture. It helps the EP(Embossing Powder) stick to only the ink.
 I also have this lil pink Top Boss ink pad for Embossing. I got it from SU! and I looked and they no longer carry it. So I would suggest to those starting out, get a Versamark pad...you can also use it to just stamp a watermark on your CS.
So I stamped my images....
And BEFORE I stamped I (Should have here) folded a piece of scratch paper in half, opened it up and put under my CS.
Then I dump a little bit of EP on my image. Here I used some Scented EP from Cornish Heritage Farms. It smells so yummy - you really need SmelloVision!! But there are tons of EP out there in many colors.
Then I just shake it off and tap the paper to make sure it's all off. Brush any excess off where you don't want the EP (This is helped by the Embossing Buddy) Then you can dump the excess back into the container. So one container can last you forever. Almost. LOL...

Useing your heat gun, wave it over the image, careful to not stay in one place or get too close. After a short bit, you will see the image start to change. It's fun to watch... And you will end up with a shiney image like so. (And it smelled good too!! LOL)
 Here above my cup I stamped with Versamark. Now, if you use a clear EP you need to use a clear ink pad, like Versamark. If you use a Colored ink pad, you will see the color under the clear EP. That is OK....if you want the color. When embossing, I just always use Versamark. It's easier for me.
 This stuff is called Glassy Glaze. It is similar to a EP, but it gives you more of a shiney look. You will see....
I apply it the same way, dump on to scratch paper, back into container.

Here you can see before I Heat it....
 And after I heated it up.
  This is Clear EP. You can stamp your image onto the Designer papers and still see that image. This is before I heated......
 And after...... Then I trimmed it out and added it to my card.
  And here is my finished card....you can click on it to make it bigger and see more details.
  This is a simple technique that adds some glam to your card. It's easy, but it does take the right tools.


2 comments:
I love how wonderfully visual this tutorial is. Thank you for taking the time to do this..
I love it.
Tejal
Yummy! How I wish this set wasn't retired!
Post a Comment